
HOW TO FIT A KITCHEN SINK

Did you know that fitting a kitchen sink doesn’t have to be a chore, especially if you have decided on one of many perfectly designed GROHE kitchen sinks. Whether it’s a durable stainless steel sink from our K200 collection or a composite sink from our K700 series, you won’t have to call a plumber to fit your kitchen sink, our guide below will tell you all you need to know about fitting a kitchen sink.

EASY SINK INSTALLATION
GROHE sinks are not only durable and come in a variety of designs, but they feature a whole host of clever solutions that make washing up a fuss-free endeavour. The K300 stainless steel sink comes with GROHE Whisper insulation on the underside of the sink, which dampens noise so you are less likely to hear the clattering of dishes, pots, and pans while washing them. With the GROHE QuickFit system installation is swiftly mastered, so you can start to use and enjoy your new GROHE sink as soon as possible.
FITTING A KITCHEN SINK
Step 1: The first step is to ensure that you have all the tools that you need to install a kitchen sink at hand. These include a pencil, jigsaw machine, sandpaper, waterproof sealant, an adjustable wrench, screwdriver, bucket and towel, pliers, and a stanley knife.
Step 2: Depending on whether you are replacing an existing sink or fitting a new kitchen sink, you might have to keep a bucket and towel handy to drain the old water that is still left in the pipes. Ensure that your new GROHE sink fits the dimensions of the previous one or is slightly larger, as this will determine the size of the hole in your worktop. Measure the sink and use the exact dimensions. It’s also important to make sure that the template is perfectly aligned on your countertop. Then use the jigsaw machine to cut out the right size hole for the new sink. Don’t forget to use a waterproof sealant on the worktop, especially on the cutout part. This will help prevent water damage to your worktop once the sink is installed.
Step 3: Attach the fixing clips to the sink, these are going to hold the sink in place. Another important step not to miss when fitting a kitchen sink is to sufficiently seal the edge of the sink. This also helps to protect your worktop from water damage. To do this, turn the sink upside down and apply the sealant around the edge of the sink, it could either be a sealant strip or putty sealant - both work well.
Step 4: Position your new sink in the gap and ensure that it is perfectly placed on the sealant around the edge of the sink. Clamp the sink in place with the clips that were previously attached to your sink. These will ensure that your sink’s rim fits securely to the worktop. At this stage use the stanley knife to carefully remove any excess sealant.
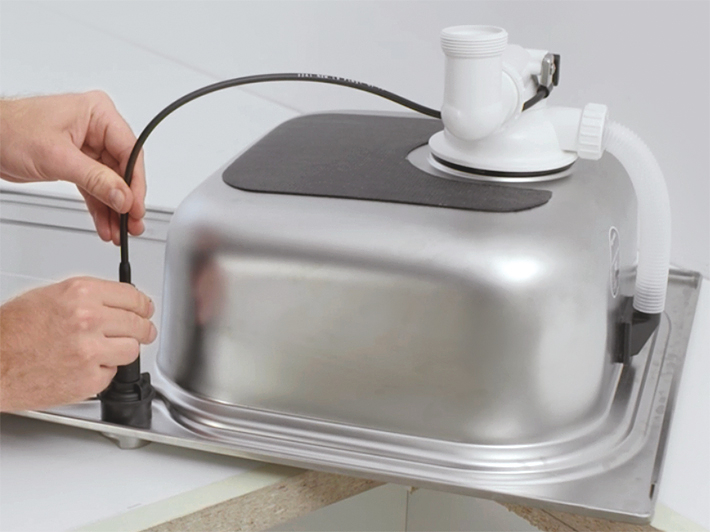
Step 5: Now it’s time to install the kitchen tap. If you decided on the GROHE BauEdge Single-Lever Sink Mixer then the taps come with the GROHE FastFixation Plus installation system to make it that much easier to install the kitchen taps. For super-fast installation, we have our GROHE QuickFix products that also include our new QuickTool which has three functions in one tool. Now connect the hoses of the tap to the main pipe and tighten the fasteners with a wrench.
Step 6: Once you have checked that there aren’t any leaks coming from the tap pipes, you can fit the waste pipe. Ideally, keep a bucket and towel underneath the pipework just in case there are any leaks. Once you have securely fitted the waste pipe, turn the taps on and inspect your work. You have now finished installing your new kitchen sink.
Now that you have installed the kitchen sink, you can enjoy your new exquisitely designed GROHE sink for a long time to come.