HOW TO INSTALL A KITCHEN SINK MIXER
You’ve already made one great decision today by purchasing a GROHE kitchen sink mixer!
And now you’re wondering if you should fit the kitchen sink tap yourself? Installing your kitchen taps may seem like a tricky undertaking, but whether you’ve purchased the
- Classic Start Single-Lever sink mixer,
- The sleek Zedra Single-Lever sink mixer, or
- Another of GROHE’s stunning models
It’s a lot easier to install than it seems once you get to grips with it. Check out our guide on how to fit a kitchen tap and see for yourself how simple it really is. It should only take about 20 minutes and you only need a couple of tools, but if you don’t feel confident enough to fit a kitchen sink tap, enlist the help of a professional to do the job for you.

REPLACING A KITCHEN SINK MIXER TAP
If you’re choosing a tap from scratch, you have the freedom to opt for any sink mixer that takes your fancy. But if your plan is to change your existing kitchen mixer tap because you’re in the mood for a new colour or a refreshing change, you should stick with the same style to make sure the fittings match up.
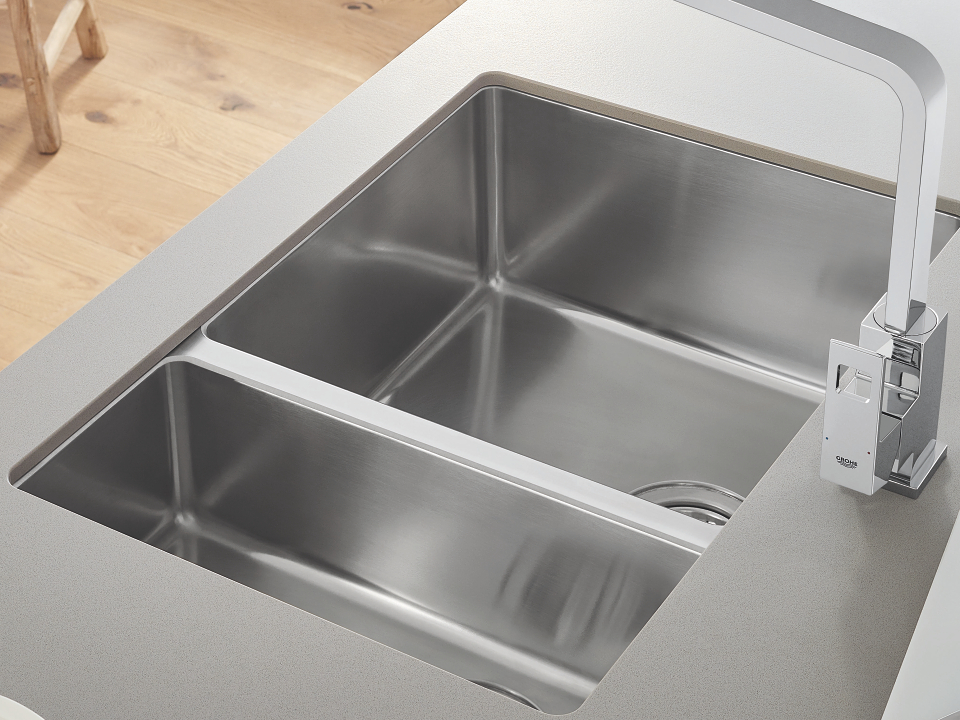
Taps are important kitchen fixtures, especially when you consider how much they’re used and how much they’re knocked around every day. You’ll be happy to know that GROHE kitchen sink mixers are coated in the GROHE StarLight chrome finish, keeping the metal as shiny as the day you bought it. You know you can count on high quality with your newly-purchased GROHE sink mixer, resulting in a long-lasting pristine appearance.
Follow this installation guide step-by-step or play the video to find out how to fit a kitchen tap and you’ll be ready to start washing vegetables or dirty dishes in no time.


PREPARATION
1. If major work is being carried out on your home, you should make sure that the water network is flushed of all impurities to avoid damaging your mixer.
2. Before dismantling your old unit (if you’re replacing your existing mixer tap), identify the hot and cold water feeds, then shut off the water supply.
3. Make sure all the parts and tools are laid out nearby so you can easily grab them while you’re working.

INSTALLING THE KITCHEN SINK MIXER
1. Pick up the mixer and watertight seal. Place the seal over the two hoses.
2. Position the seal so that it sits securely on the base of the tap and hold it there.
3. Pass the hoses through the hole in the sink where the mixer should later be fixed.
4. Place the mixer so that the watertight seal is in contact with the sink and hold the mixer in this position.
5. Tip: Pull down on the hoses to hold the mixer firmly in place until it can be properly attached.
6. Place the stabilisation ring over the hoses, and then along the threaded rod. Do the same with the tightening seal, the tightening shim and then, lastly, place the tightening nut. Tighten the nut as much as possible by hand (this is also recommended if you’re trying to fix a leaking tap mixer kitchen – tightening the nuts under the sink could solve the problem).
7. Release the mixer, which is now held in place by the nut, and check whether you’re satisfied with its positioning. Adjust it if necessary.
8. Hold the mixer and use a 13 mm open-end wrench to tighten the nut without forcing too hard. This is only the case when using small nuts.

TURNING ON THE WATER
1. Make sure there is a seal inside both the hoses. If not, add a fibre or rubber seal. Screw the left-hand hose onto the hot water tap, and the right-hand hose on the cold water tap. Tighten with a 19 mm open-end wrench. Make sure there are no kinks or bends in the hoses.
2. Turn on the water supply to the basic mixer tap and make sure that everything is watertight and there are no leaks.
3. Make sure the mixer is operating properly.
Congratulations, you have finished installing your new GROHE kitchen sink mixer. If you’re looking for other products to match your mixer, consider looking at GROHE products that share the same name for an automatic match. For example, this minimalistic Zedra soap dispenser is the same design and refined chrome colour finish as the Zedra Single-Lever sink mixer mentioned above.
If there are any other of our products that you would like to fit yourself, but need guidance to do so, check our other installation guides and discover all of our products on grohe.com/uk.