HOW TO FIT A SHOWER MIXER: THE GROHE GUIDE
You’re happy with the thermostatic shower mixer you just purchased, but have no idea how to fit it?
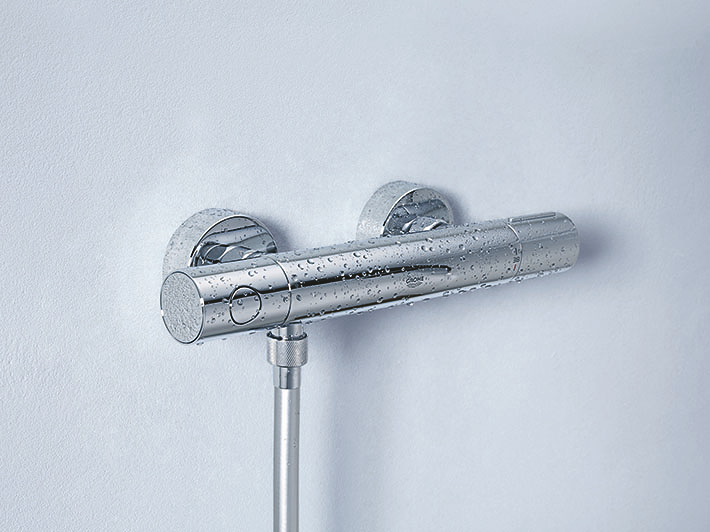
No matter whether you are now the proud owner of the sleek GROHTHERM SPECIAL THERMOSTATIC, or the angular GROHTHERM CUBE THERMOSTATIC shower mixer, the installation process is still the same. Fixing a shower mixer is a relatively simple and straightforward process, so don’t worry about it being too difficult:
Follow this step-by-step installation guide or watch the video to find out how to install a shower mixer tap. It should take you around 40 minutes. Fitting a shower mixer is often much more straightforward than you may think.
Note: If you have to remove the old unit first, just make sure you turn off the water supply before you begin.

REQUIREMENTS: TOOLS & ACCESSORIES
All the parts you need to change the shower mixer are included.
However, you will need some tools to make fitting the shower mixer even easier. Here’s what you will need:
- 22 mm open-end wrench
- 32 mm open-end wrench
- Tape measure
- Spirit level
- PTFE tape
- Silicon
- Thermometer
- Flat-head screwdriver

STEP-BY-STEP: INSTALLING A SHOWER MIXER
Now the installation process can begin.
Follow these instructions and your new shower will be ready to use in next to no time.
BEFORE YOU GET STARTED
- If major work is being done on your home, the water network must be flushed of all impurities to avoid damaging your mixer.
- Before dismantling your old unit, make sure the hot water feed is on the left, and that the cold water feed is on the right. Call a professional if this is not the case.
- Ensure all the parts and tools are laid out ready and within reach.
PREPARATION
- Screw the s union connectors into the fittings in the wall so that they protrude by about 42 mm.
- Screw the escutcheons into the wall.
- Adjust the spacing so that there is 150 mm between the centres of both escutcheons, and then check that they are straight using a spirit level. Adjust if necessary.
- Attach the mixer and tighten firmly. The nuts must not touch the escutcheons. Adjust if necessary and check that it’s still straight.
- Unscrew everything and make a note of how far the s connectors protrude from the wall.
INSTALLATION
- Wind the PTFE tape around the s union connector whilst making sure that it’s wrapped in the direction of tightening.
- Tighten the s union connectors with the 22 mm open-end wrench.
- Adjust the connectors so that there is a space of 150 mm from centre to centre. The s connectors should protrude from the wall the same distance as what you noted down in your previous measurements. Then check they are even using a spirit level.
- Apply silicon where the wall and the eccentric connectors meet, in order to make a seal.
- Screw the escutcheons onto the s union connectors.
- Remove the red and blue caps from inside the thermostatic mixer. Check that the filters are the right way round inside the mixer: the rounded side should be facing inwards.
- Place the mixer on the s union connectors, without adding any additional seals, then tighten the nuts using the 32 mm open-end wrench.
- Use the spirit level once again to make sure the mixer is level. Adjust if needed. Check for leaks by turning on the water supply to the mixer.
ADJUSTMENTS
- Now make sure the thermostatic mixer is operating properly. Turn on the water and hold the thermometer under it to check the water temperature. If the thermometer shows 38°C when the handle lines up with the 38°C marker on the shower body, then you don’t need to make any adjustments.
- If, however, the temperature and the marker don’t match up, close the water evacuation outlet and remove the cover on the mixer handle by prising it off with a small flat-head screwdriver.
- Loosen the screw, then remove the handle.
- Run the water and at the same time, adjust the thermostatic cartridge by turning the notched black element back and forth until the temperature reaches 38°C. Put the handle back on (with the 38°C marker facing forwards), screw it into place, and put the cover back on.
END SPURT
Almost done! Now it’s time to connect the shower hose. Make sure the seal in the hose is in the correct position and then screw the end onto the bottom of the mixer. Last, but not least, turn on the water to make sure that the showerhead is working as it should be.
Congratulations! Now that you know how to fix your shower mixer and have successfully installed your new GROHE product, you can relax and enjoy the perfect shower.
Check our other installation guides here if you have more fittings you wish to install, and discover all of our products on grohe.co.uk.