Install a single-lever<br/>bath/shower mixer
Follow this installation guide steps by steps or play the video to watch the installation.
Preparation
![](http://cdn.cloud.grohe.com/Web/4_3/ZZH_T23230A01_000_01_4_3/4_3/960/ZZH_T23230A01_000_01_4_3_4_3.jpg)
1 - If major work is done on the home, the water network must be flushed of all impurities to avoid damaging your mixer.
![](http://cdn.cloud.grohe.com/Web/local_assets_4_3/service/fr_fr/install-single-lever-bath-mixer-3_4_3/4_3/960/install-single-lever-bath-mixer-3_4_3_4_3.jpg)
2 - Before dismantling your old unit, make sure the hot water feed is on the left, and that the cold water feed is on the right. Call a professional if that is not the case.
![](http://cdn.cloud.grohe.com/Web/local_assets_4_3/service/fr_fr/install-single-lever-bath-mixer-4_4_3/4_3/960/install-single-lever-bath-mixer-4_4_3_4_3.jpg)
3 - Prepare parts and tools with close access to the connections.
Turn off the water supply before dismantling your old unit.
Preparation
![](http://cdn.cloud.grohe.com/Web/local_assets_4_3/service/fr_fr/install-single-lever-bath-mixer-5_4_3/4_3/960/install-single-lever-bath-mixer-5_4_3_4_3.jpg)
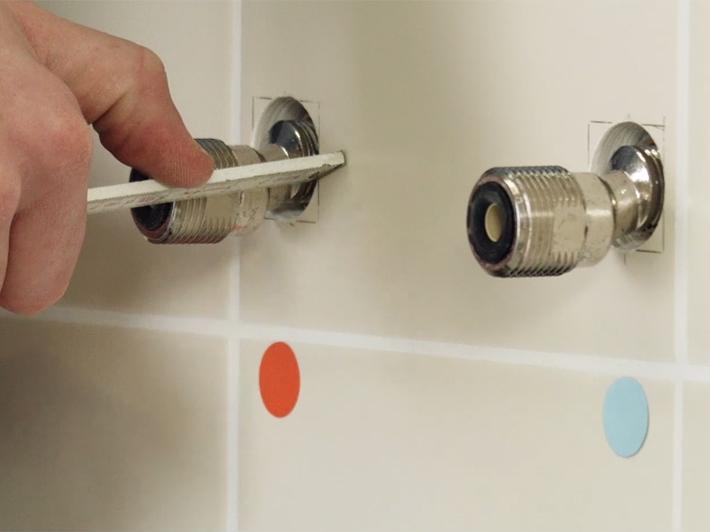
1 - Screw the s union connectors in to your fittings in the wall so that they extend by about 42 mm.
![](http://cdn.cloud.grohe.com/Web/local_assets_4_3/service/fr_fr/install-single-lever-bath-mixer-6_4_3/4_3/960/install-single-lever-bath-mixer-6_4_3_4_3.jpg)
2 - Screw the escutcheons against the wall.
![](http://cdn.cloud.grohe.com/Web/local_assets_4_3/service/fr_fr/install-single-lever-bath-mixer-7_4_3/4_3/960/install-single-lever-bath-mixer-7_4_3_4_3.jpg)
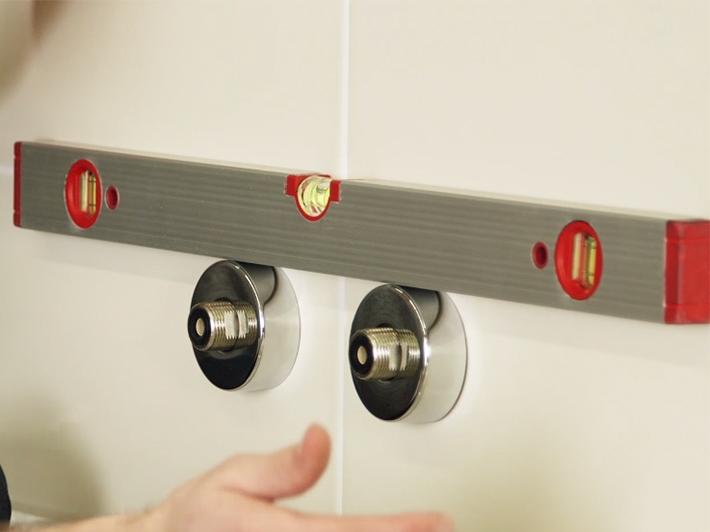
3 - Adjust the spacing so that there is 150 mm between the centres of the escutcheons, and then verify they are level . Adjust if necessary.
![](http://cdn.cloud.grohe.com/Web/local_assets_4_3/service/fr_fr/install-single-lever-bath-mixer-8_4_3/4_3/960/install-single-lever-bath-mixer-8_4_3_4_3.jpg)
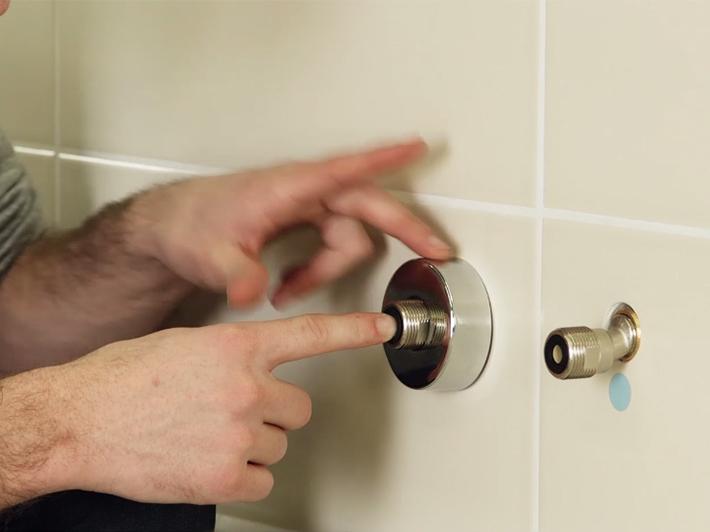
4 - Install the mixer and tighten firmly. The nuts must not touch the escutcheons. Adjust if necessary and verify horizontal positioning. Remove the assembly.
![](http://cdn.cloud.grohe.com/Web/local_assets_4_3/service/fr_fr/install-single-lever-bath-mixer-9_4_3/4_3/960/install-single-lever-bath-mixer-9_4_3_4_3.jpg)
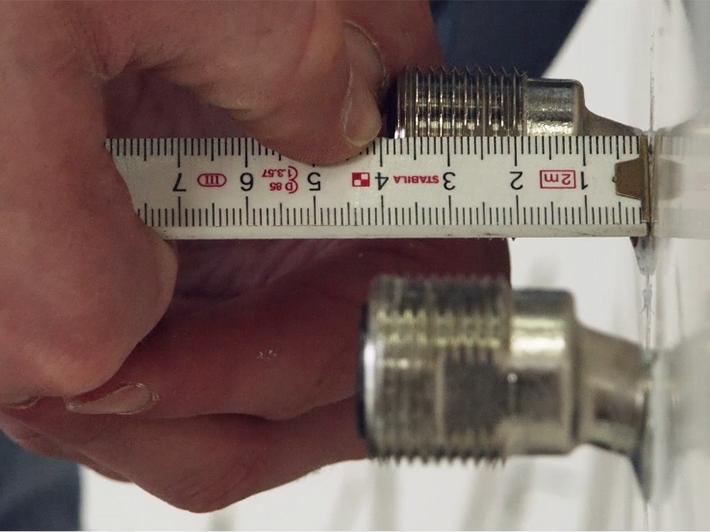
5 - Note the depth between the s union connectors and the wall.
Installing the single-lever mixer
![](http://cdn.cloud.grohe.com/Web/local_assets_4_3/service/fr_fr/install-single-lever-bath-mixer-10_4_3/4_3/960/install-single-lever-bath-mixer-10_4_3_4_3.jpg)
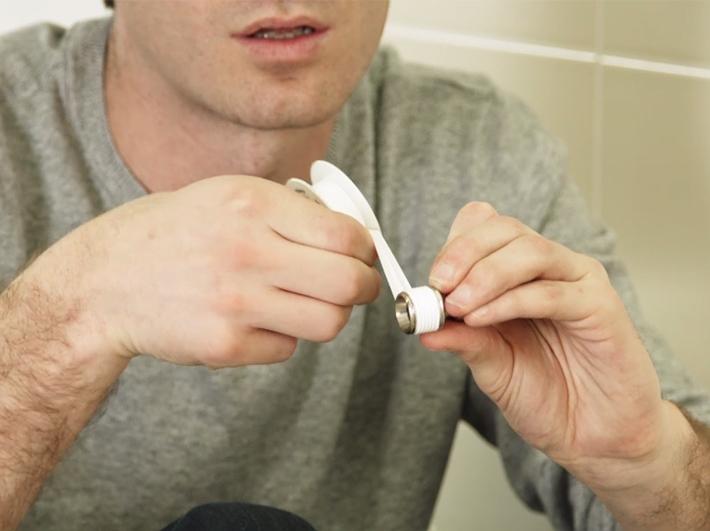
1 - Seal the thread of the eccentric connector using PTFE tape, wrapped in the tightening direction.
![](http://cdn.cloud.grohe.com/Web/local_assets_4_3/service/fr_fr/install-single-lever-bath-mixer-11_4_3/4_3/960/install-single-lever-bath-mixer-11_4_3_4_3.jpg)
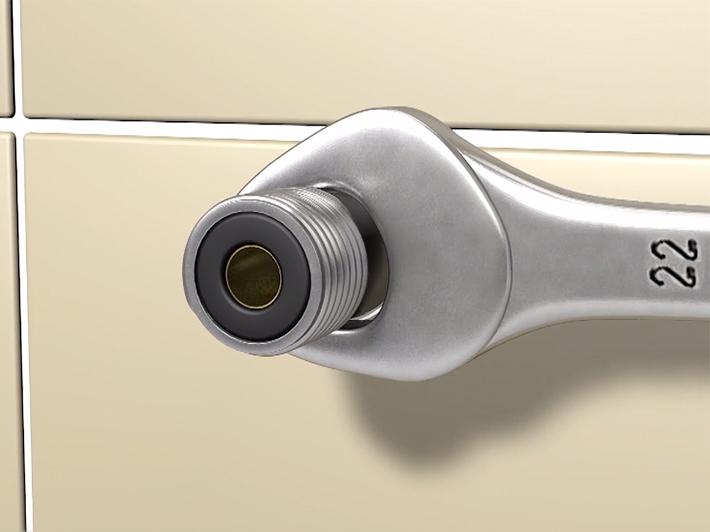
2 - Tighten the s union connectors with a 22 mm open-end wrench.
![](http://cdn.cloud.grohe.com/Web/local_assets_4_3/service/fr_fr/install-single-lever-bath-mixer-12_4_3/4_3/960/install-single-lever-bath-mixer-12_4_3_4_3.jpg)
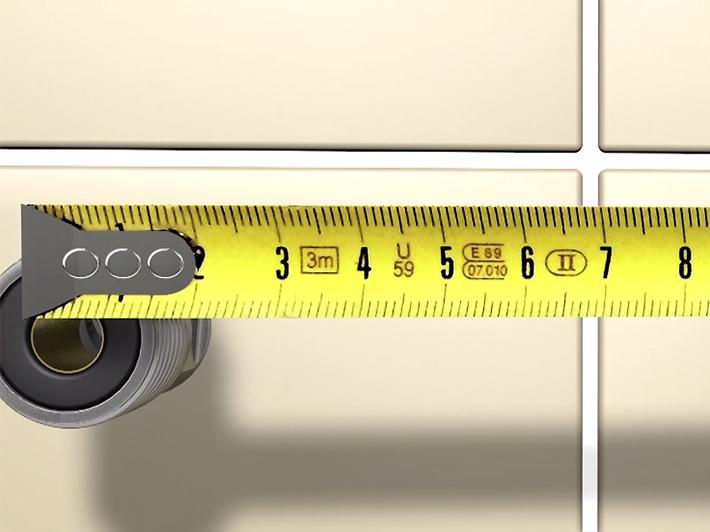
3 - Adjust the connectors so that there is a space of 150 mm centre to centre, and the same depth, as noted from your previous measurements. Then check They are level using a spirit level.
![](http://cdn.cloud.grohe.com/Web/local_assets_4_3/service/fr_fr/install-single-lever-bath-mixer-13_4_3/4_3/960/install-single-lever-bath-mixer-13_4_3_4_3.jpg)
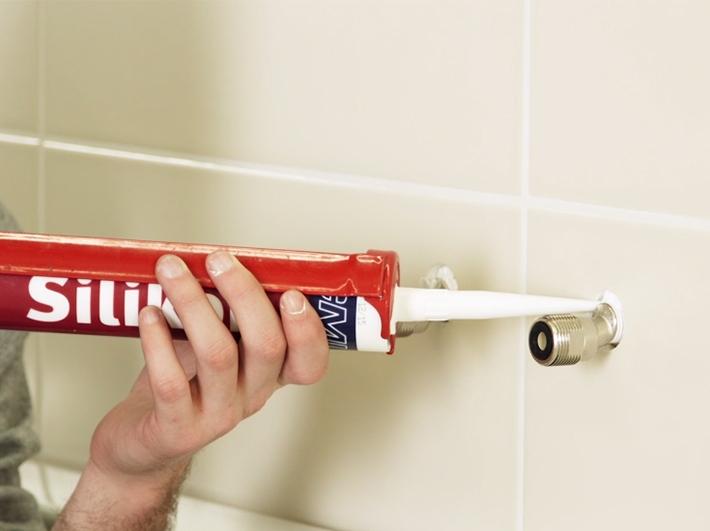
4 - Apply a silicon seal between the wall and the eccentric connectors.
![](http://cdn.cloud.grohe.com/Web/local_assets_4_3/service/fr_fr/install-single-lever-bath-mixer-14_4_3/4_3/960/install-single-lever-bath-mixer-14_4_3_4_3.jpg)
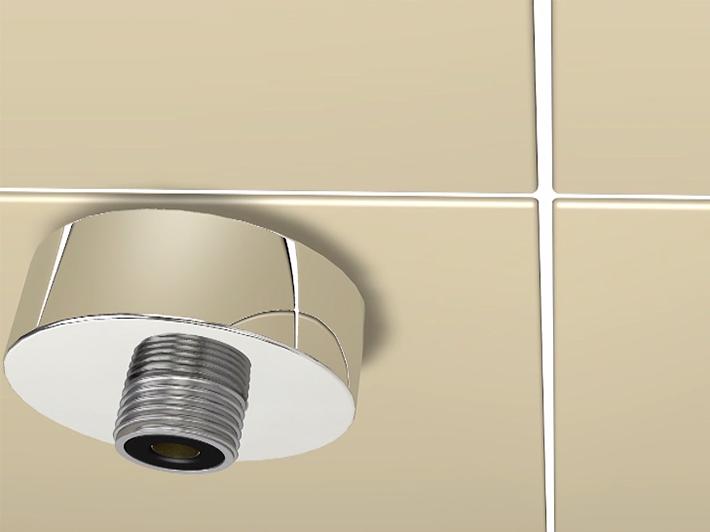
5 - Screw the escutcheons onto the s union connectors.
![](http://cdn.cloud.grohe.com/Web/local_assets_4_3/service/fr_fr/install-single-lever-bath-mixer-15_4_3/4_3/960/install-single-lever-bath-mixer-15_4_3_4_3.jpg)
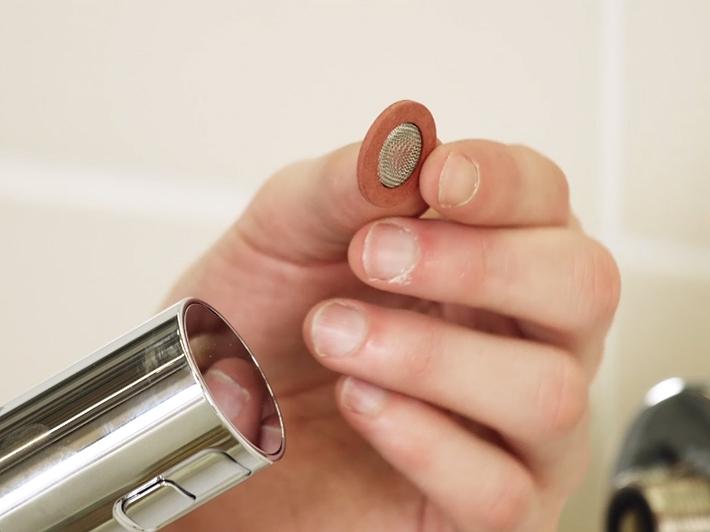
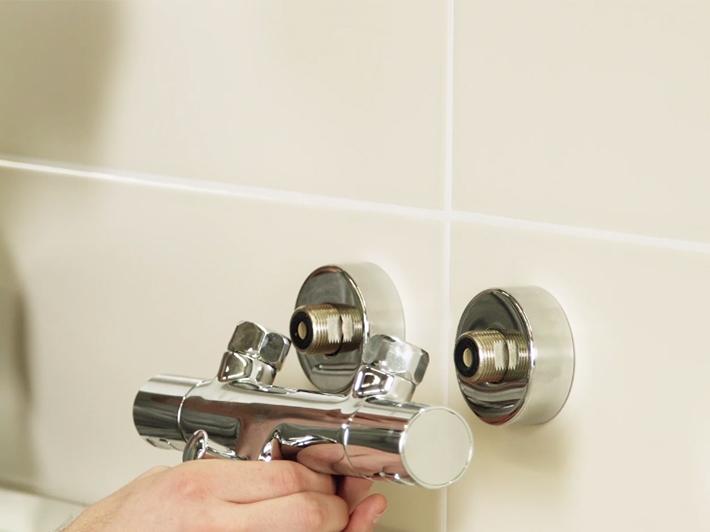
6 - Remove the red and blue caps from the mixer. Make sure the filters are placed correctly, with the rounded side facing inwards.
![](http://cdn.cloud.grohe.com/Web/local_assets_4_3/service/fr_fr/install-single-lever-bath-mixer-16_4_3/4_3/960/install-single-lever-bath-mixer-16_4_3_4_3.jpg)
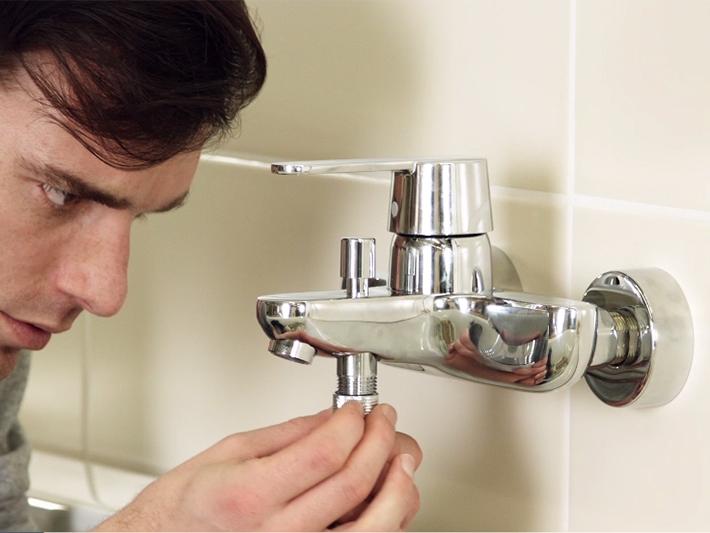
7 - Place the mixer on the s union connectors, without adding any additional seals, then tighten the nuts using a 32 mm open-end wrench.Ā
![](http://cdn.cloud.grohe.com/Web/local_assets_4_3/service/fr_fr/install-single-lever-bath-mixer-17_4_3/4_3/960/install-single-lever-bath-mixer-17_4_3_4_3.jpg)
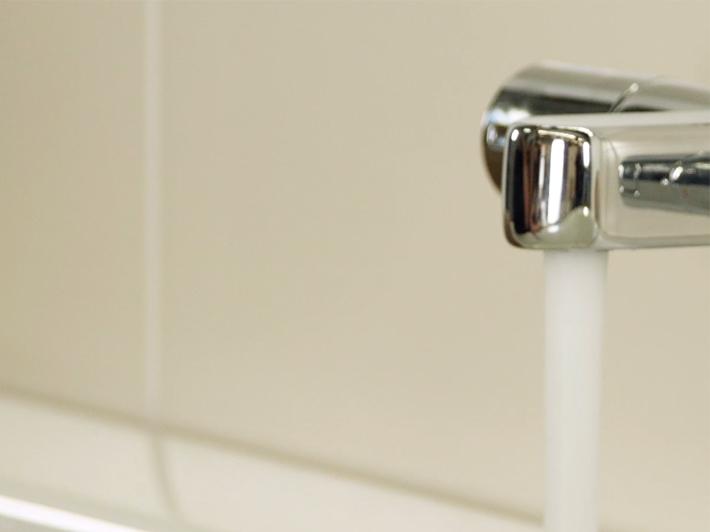
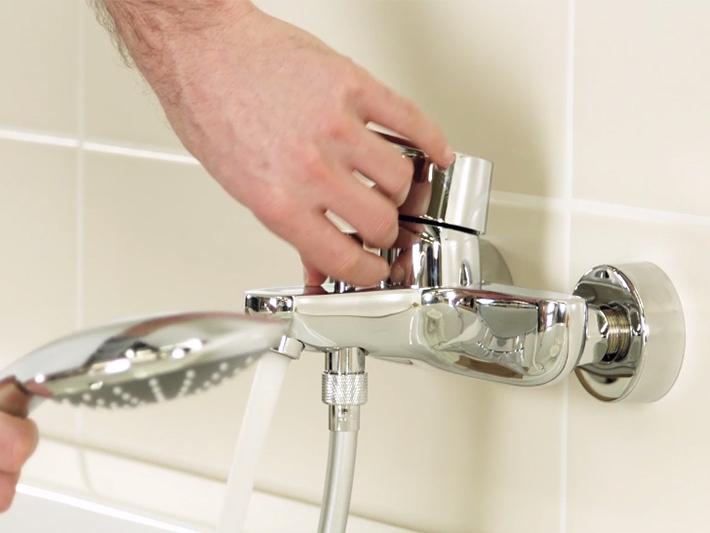
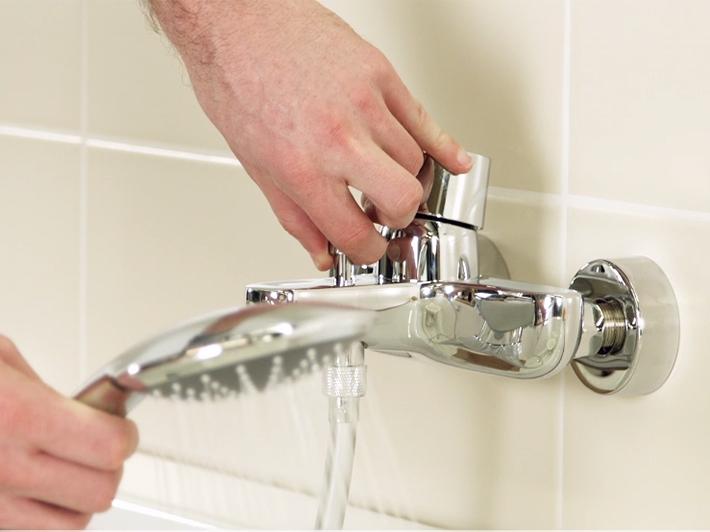
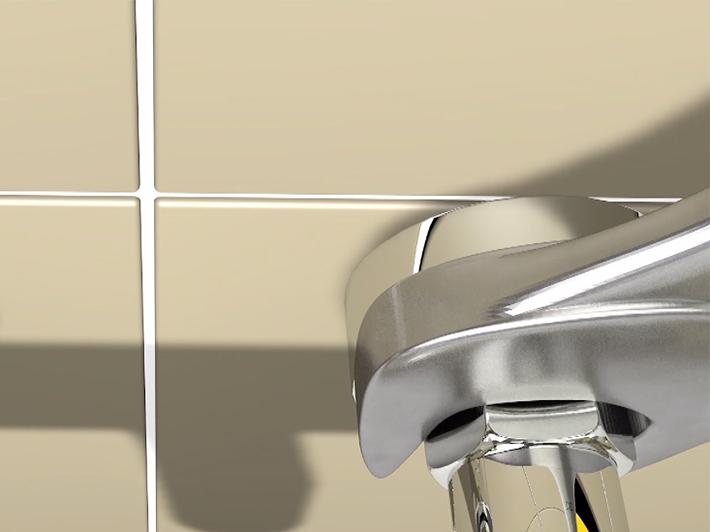
8 - Use a spirit level to make sure the mixer is level. Adjust it if necessary. Check for leaks by turning on the water supply to the mixer.
Connecting the shower hose
![](http://cdn.cloud.grohe.com/Web/local_assets_4_3/service/fr_fr/install-single-lever-bath-mixer-18_4_3/4_3/960/install-single-lever-bath-mixer-18_4_3_4_3.jpg)
Make sure the seal in the hose is in the correct position and then screw the end into the mixer.
Turning on water
![](http://cdn.cloud.grohe.com/Web/local_assets_4_3/service/fr_fr/install-single-lever-bath-mixer-19_4_3/4_3/960/install-single-lever-bath-mixer-19_4_3_4_3.jpg)
Make sure the single-lever mixer is operating properly.
![](http://cdn.cloud.grohe.com/Web/local_assets_4_3/service/fr_fr/install-single-lever-bath-mixer-20_4_3/4_3/960/install-single-lever-bath-mixer-20_4_3_4_3.jpg)
Pull the bath/shower diverter knob to use the hand shower.
![](http://cdn.cloud.grohe.com/Web/local_assets_4_3/service/fr_fr/final_4_3/4_3/960/final_4_3_4_3.jpg)
Congratulations, you have finished installing your new GROHE product. Check our other installation guides and discover all of our products on grohe.com/uk